I’m addicted to making fabric storage bins. How about you?
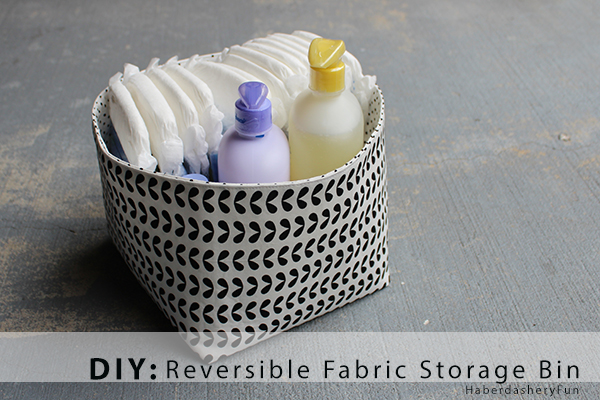
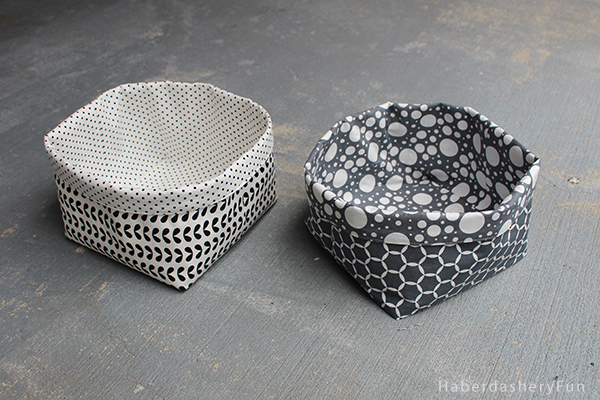
I made smaller versions of these last year and have always wanted larger ones. I finally had a few free hours to work on the pattern and get a few made. I love how they turned out and how they look with the top edge rolled down. And they are reversible too!
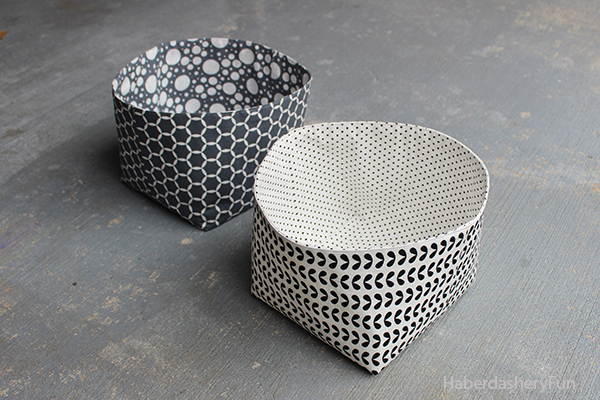
Wouldn’t they make an awesome baby shower or house warming gift? Fill it with a bunch of goodies and you are good to go..The only problem I see is that if you make one to give as a gift, you may decide to keep it at the last moment. I’ve done this before.
The finished size is 8.5″L x 9″W x 7″H
Supplies Needed:
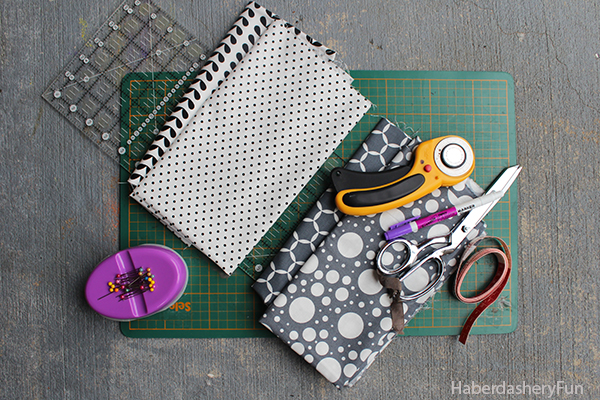
- Cotton fabric outside – 1/2 yard
- Cotton fabric lining – 1/2 yard
- Pellon Décor-Bond 809 – 1 yard
- Sewing machine and related supplies
- Rotary cutter, cutting mat, quilting rotary cutting ruler
- Disappearing ink pen
- Iron and ironing board
Before we get started, you will need to complete the following:
- Cut your fabric – cut 2 rectangles measuring 18″ x 24″ from the outside and lining fabrics. Repeat and cut another 2 rectangles from the Pellon Décor-Bond 809.
- Fuse the Décor-Bond to the wrong side of the main and lining fabrics.
Alright, let’s get sewing your simple fabric bin!
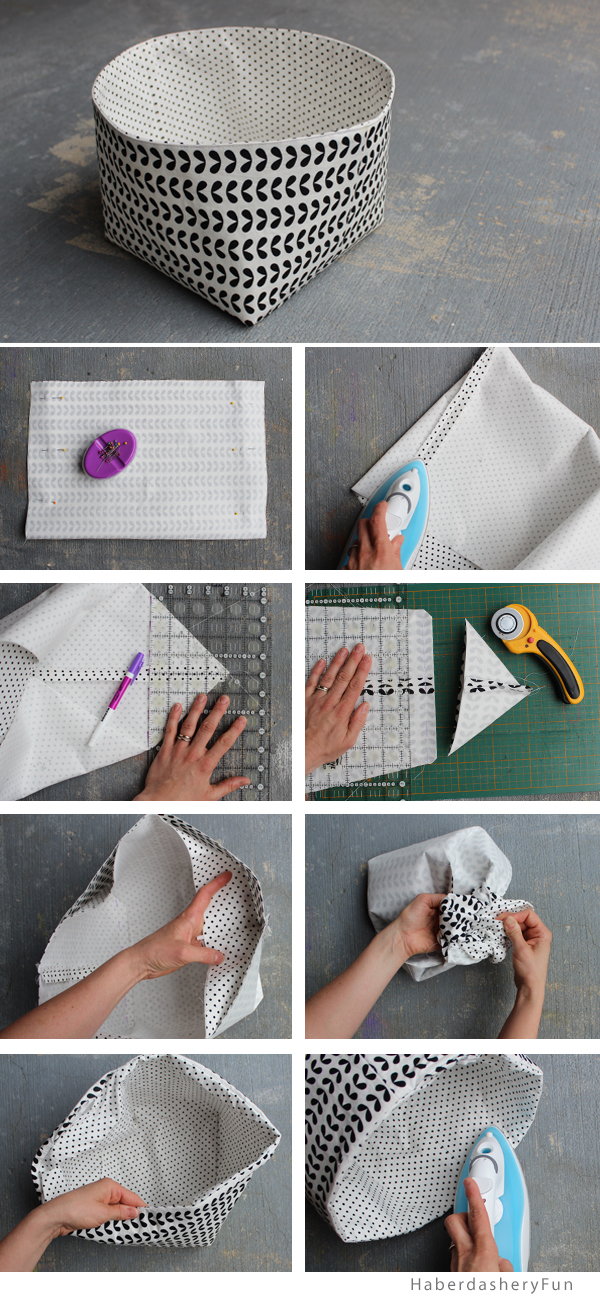
- Fold the rectangle in half, to measure 18″ x 12.” Pin along sides if needed. Place into sewing machine and stitch with a 1/2″ seam allowance.
- Press side seams while closed. Open and press again.
- Sew those boxed corners! Start with the main fabric. Wiggle the fabric around so that the side seams are facing upwards. Make a point and also make sure that the sides sit at a 45 degree angle. Finger press any wrinkles out. Measure 4″ upwards from the tip and mark a dashed line with a disappearing ink pen. Pin. Place into sewing machine and stitch following the dashed line. Backstitch. Repeat for the other side and again for the lining fabric.
- Place the quilting ruler onto the corner. Lay the ruler so you have a 1/2″ seam allowance. Cut along the ruler edge using a rotary cutter [ you will cut the tip off]. Repeat for the other side and again for the lining fabric.
- Turn project so they sit as bins. Main bin is facing right side in and lining bin is facing right side out. Place the lining bin into the main bin. Wiggle the corners into place. Make sure side seams match up. Pin around the top edge. Place into the sewing machine and stitch together with a 1/2″ seam allowance. Leave a 4″ opening near a side seam. Press with an iron.
- Gently pull the bin through the 4″ opening.
- Wiggle the fabric into place. Roll down top edge to sit into place and make sure all corners match. Press along top edge with an iron, turn the 4″ opening seam allowance under. Press in place. Pin if needed. Place into the sewing machine and edgestitch along the entire top edge.
- Press the bin with an iron.

That’s it! Easy right? Well I have great news.. This project is available over at the Pellon Projects website. Click here to head on over to get the PDF. You can save the tutorial and print it later.
Want to sew other reversible projects? How about a great everyday bag? Click here for my Reversible Tote Tutorial.
Fabric reference.. I LOVE this fabric. I bought a bunch of coordinating fabric from this collection. It is from Moda Fabrics and called “Shades of Black” by Me and My Sister Designs.
Original article and pictures take haberdasheryfun.com site
Комментариев нет:
Отправить комментарий