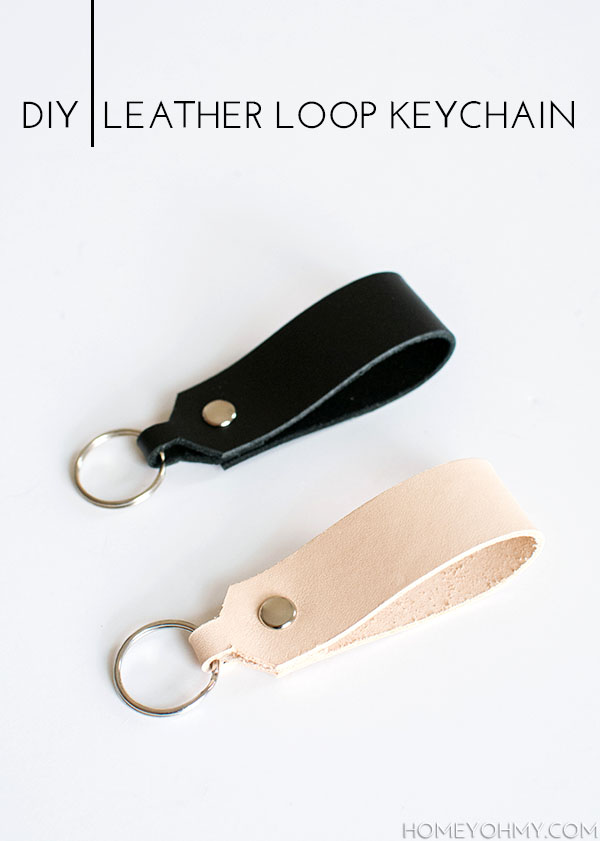
I’ve been meaning to do another leather DIY after how much I loved my first encounter with the stuff, but even better about this one is that it was boyfriend requested! Just a simple and sleek leather keychain to help carry around keys. Happy to do it, sir. I was already feeling inspired by these key rings from The Everygirl, so it was meant to be.
I actually made three, but the first one was a complete disaster because I was rushing to beat sundown (blogger. problems.) so I’ll share a couple morsels of cautionary tips as I go on with the instructions. In general though, this is a fairly simple DIY and a great beginner project for anyone wanting to get into leather crafting.
Materials:
tooling leather
ruler
rotary cutter
X-ACTO knife
leather awl
leather punch (Kind of. I’ll explain this in the steps.)
rivet kit
key ring

Here are the rough measurements for the leather piece. I used a rotary cutter and ruler to cut off a one inch wide strip, then used a pencil to draw out the little trapezoid shaped cut-outs shown above. Those smaller pieces were cut with an X-ACTO knife, and was probably the most difficult part. Getting those corners cut clean takes patience, guys.
Mistake #1: I didn’t think at all at first about how long I wanted the loop to be so I just left it the length that it was, only to find out later that it was awkwardly long. The next time around I measured and cut the loop length to 6″ as marked above, but the actual leather in the photos of all the steps is longer, so just an FYI for anyone that was detailed enough to notice that it didn’t look like 6″. Anyone?


So this part is a little weird. I already had this leather awl and thought it would be enough to poke a hole big enough for the rivets, but it wasn’t. This is where I want to say that it’s best to use a leather punch for the holes after first marking where they should go, then to punch out a hole in each layer of the leather. Buuuuuut if you’re like me and want to avoid getting a leather punch, I improvised by poking the awl through all three layers of leather, then enlarging each hole by sticking an X-ACTO knife through in a cross formation. It isn’t neat and it’s a bit tricky, but it worked. Just need to be careful not to push the knife too far into the hole or else it will cut a slit that’s too big (Mistake #2 from my first time around).

The best part. Have you used rivets for anything? They’re amazing, and this rivet kit is spectacular. After slipping the key ring through and pushing the rivet backing through the holes, I hammered the rivet shut.
Mistake #3: Maybe it was the adrenaline from rushing, but for the first keychain I made, I bashed the life out of the rivet. This somehow misaligned the top and bottom and it shut diagonally and off-center, which wasn’t cute at all. Bashing is completely unnecessary. Light taps with the hammer are sufficient, and you can go progressively harder if needed, but not too hard.


I’ve totally been in this kind of color mood lately, namely no color. Is it the winter? Neutrals are a favorite forever, but just even more so lately. Also, I guess tooling leather only comes in so many colors, ha! Boyfriend initially requested brown, but I couldn’t even find that. Poor him. Which of these two colors do you prefer?
Original article and pictures take www.homeyohmy.com site

Комментариев нет:
Отправить комментарий