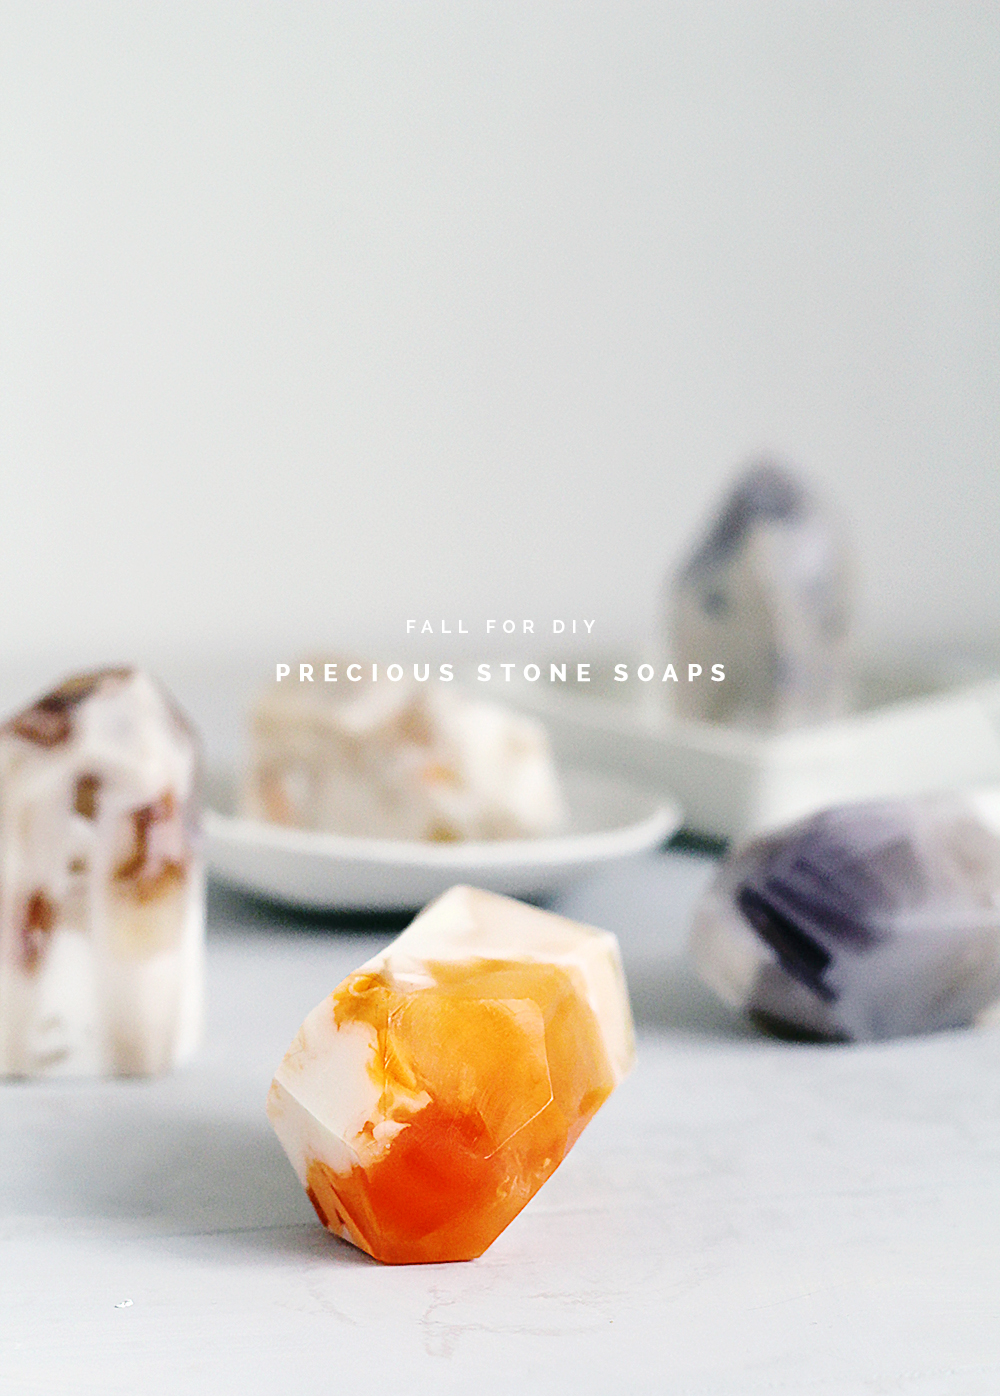
If you follow me on Instagram you might have seen me posting regular updates from this project. It’s probably one of my favourite DIYs to date and that took me by surprise! When Stephenson Personal Care contacted me to collaborate on a project I must admit my first thoughts were that soap making and bar soap were a little dated, but after a little research I found out that bar soap is making a comeback in a big way. Not only can you make beautiful colours and patterns but you have control over the extras that go into the soap. You can infuse with natural scents and colours rather than the chemicals in most mass produced soaps.
Another reason I was very happy to work with Stephenson Personal Care was their strict policy against animal testing and focus on only using plant derived ingredients. That along with their long list of organic, sustainable and Fairtrade accolades gave me huge confidence that their products were ethically produced which is definitely becoming an increasingly important factor, especially in my cosmetic choices.
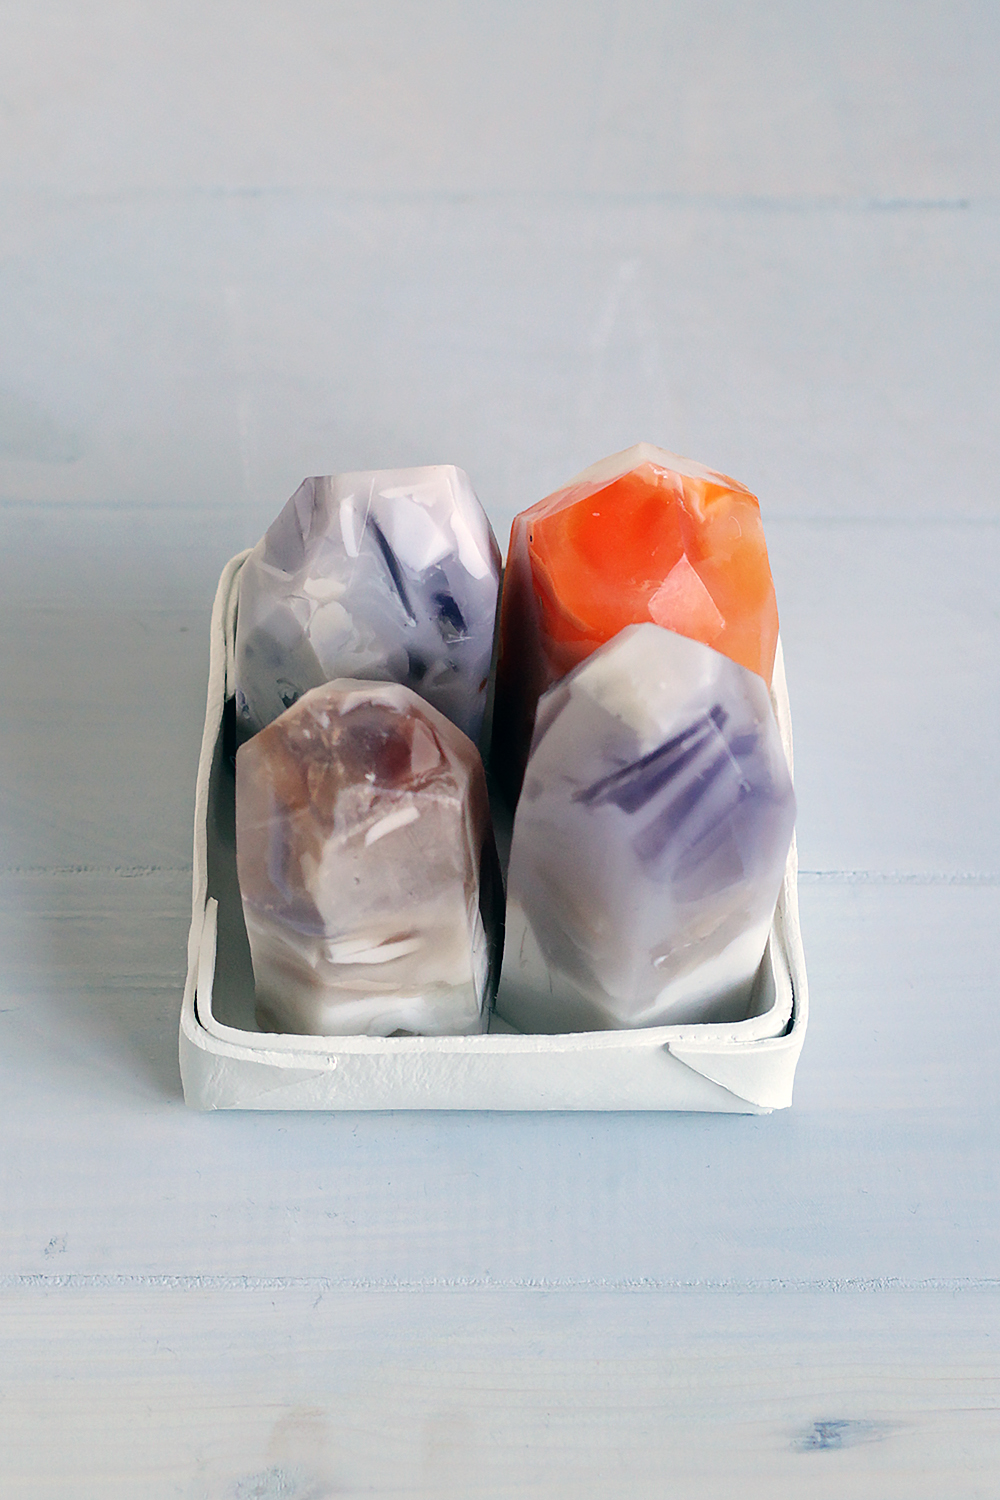
So I threw myself into soap making! I had a lot of comments on my DIY Silicone Mould post asking if the silicone was a suitable mould making material for soap. This project gave me the perfect opportunity to try it out and answer some of those questions (and you guys know how much I love my faux semi precious stone like this DIY Faux Geode Necklace or this Faux Agate Slice tutorial). I had so much fun colouring and shaping these soaps I’m converted and I haven’t even started to explore the possibilities of flavours and scents.
Keep reading to find out how to make these DIY Semi Precious Stone Soap yourself at home.
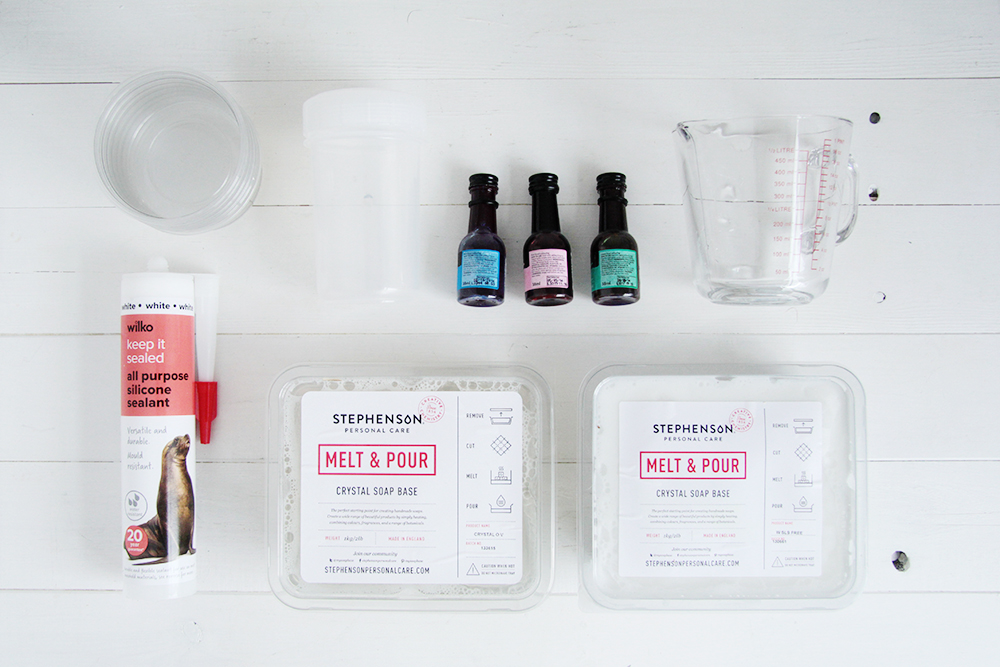
Materials:
- Food colouring
- Glass microwave safe measuring jug
- Silicone Caulk (for mould making) x 2
- Range of tupperware pots
- Stirrer
- Retractable Blade Knife
- Masking Tape
- Scissors
Instructions:
1. Follow the steps in this DIY Silicone Mould tutorial to make the base for your moulds. Spread you first batch between small pots and press slightly smaller jars into the silicone to create to small moulds. You can use heat proof containers as your moulds at this point but they must be able to withstand high heat.
2. After a few hours your moulds will be ready. Remove the jars and wash the silicone thoroughly with soap and water. Now your moulds are ready to use!
3. Cut off roughly the amount of soap you’ll need to fill the mould and chop it up into small chunks. Throw them into your microwavable jug and put in the microwave for 30-45 seconds. Take it out and stir. If any of the soap is still solid reheat for 15 seconds at a time until the soap is liquid.
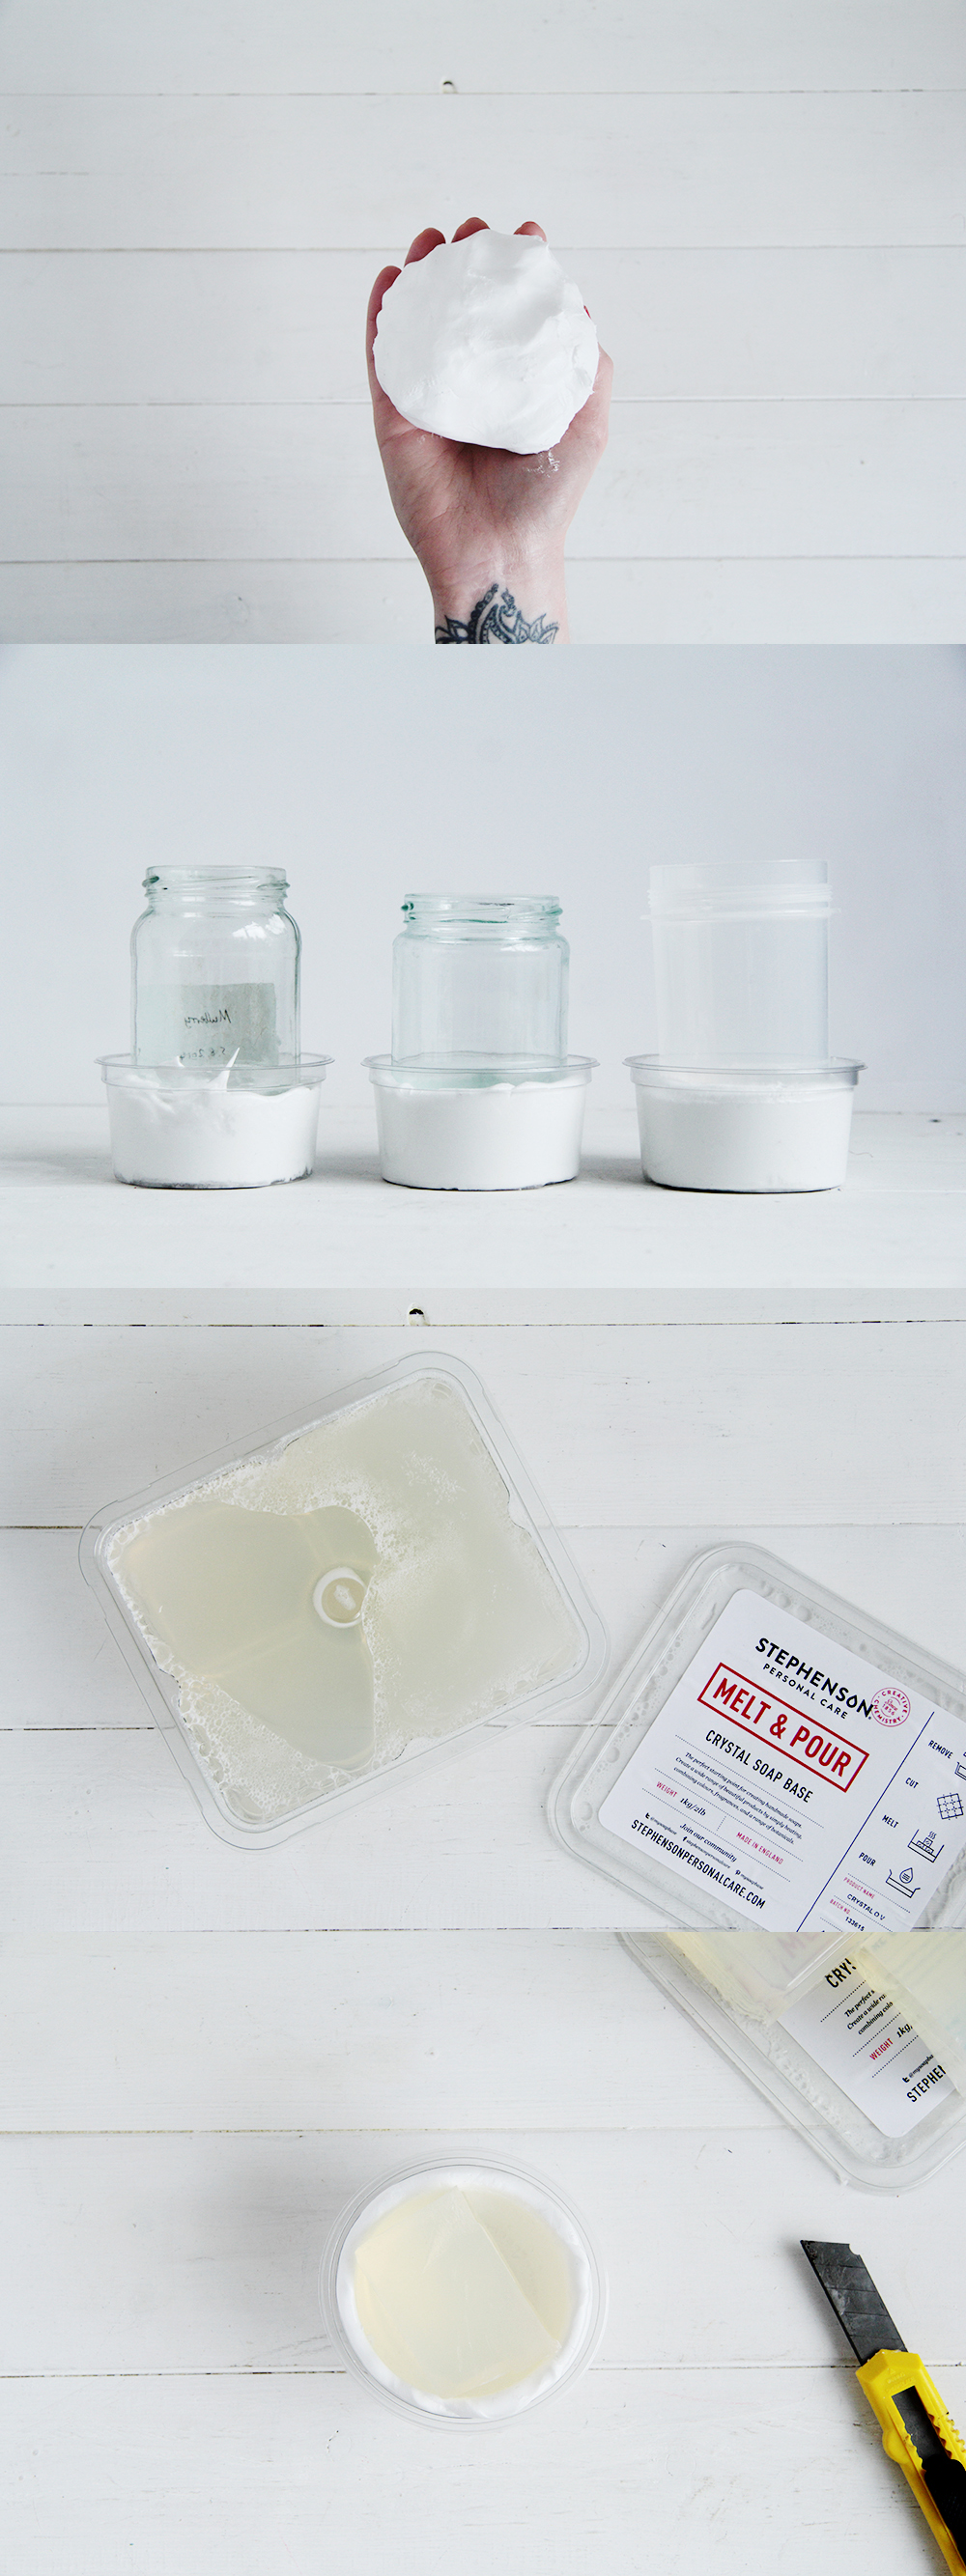
4. Now comes the fun part! Colour your soap by pouring droplets of food colouring into the soap. Little by little build up colour. Mix together and pour into the silicone mould.
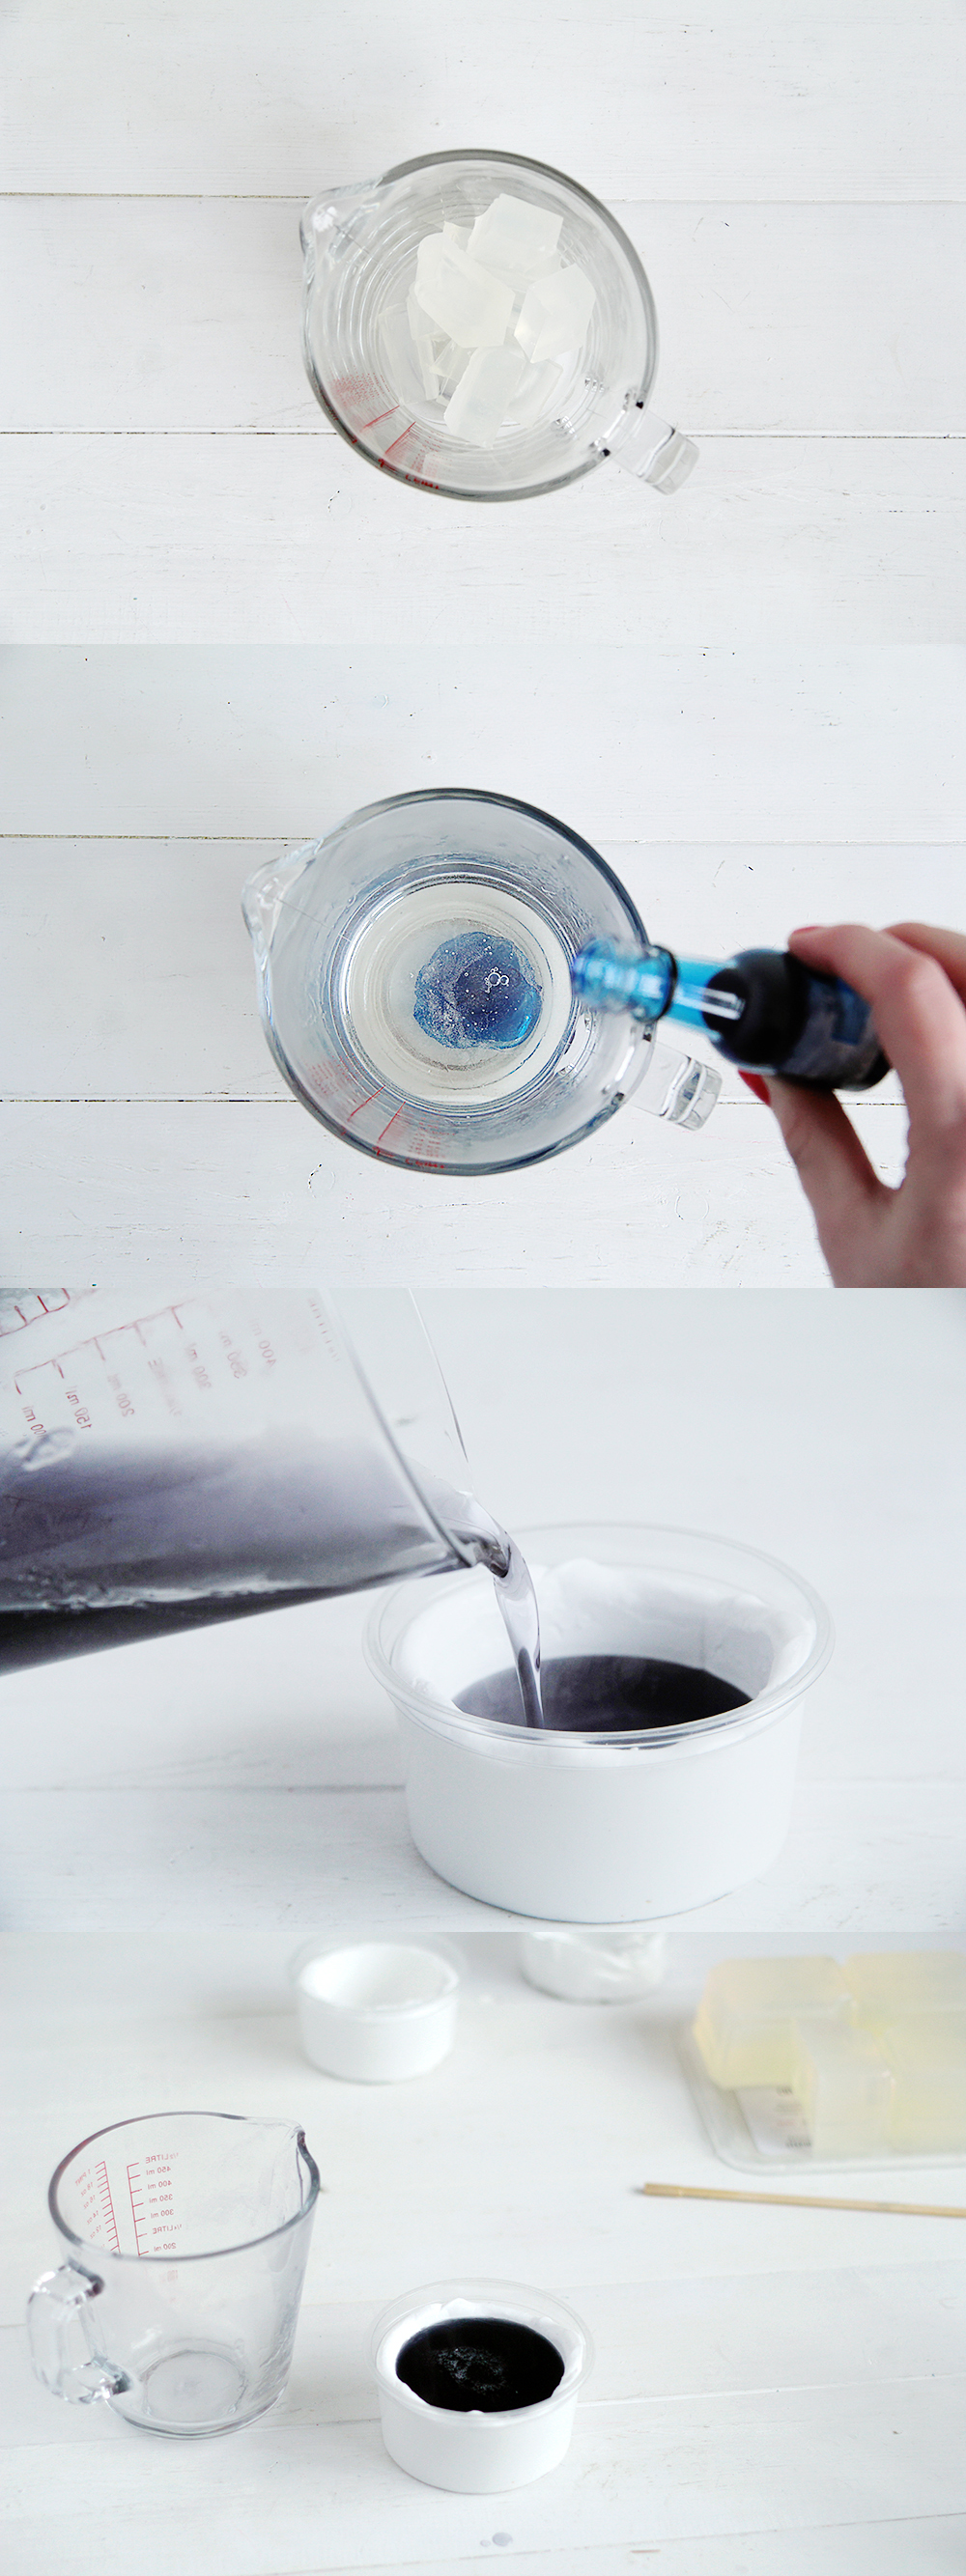
5. Now you have to leave to cool and harden. This will take about 12 hours in a cool room but I’m inpatient and put mine in the fridge for a few hours. If you’re like me make sure the mould is no where near any open food (silicone is poisonous!) and there are no curious hands around that might think this is a edible treat. No eating the soap please!
You might notice that the fist few times you use the mould the soap at the edges doesn’t set. I think this is some sort of reaction with the silicone. When you remove the soap just give it a wash to get rid of the liquid soap residue. After 2/3 uses this should stop happening.
I’ve also seen soap makers using an alcohol spray to stop the top part of the soap misting up. We don’t really need to worry about this step as we are cutting into the soap later.
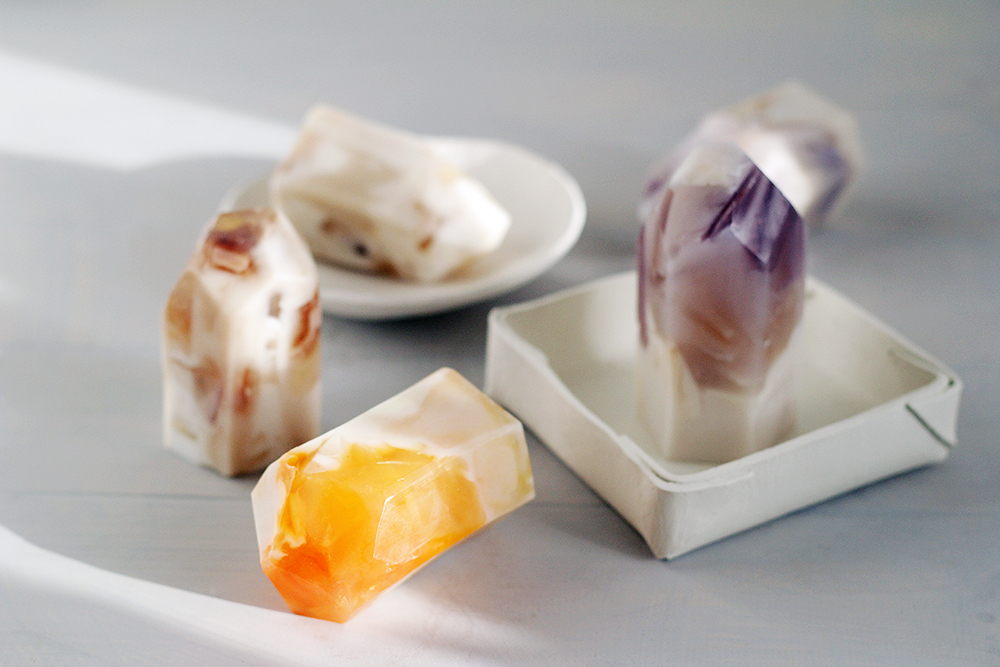
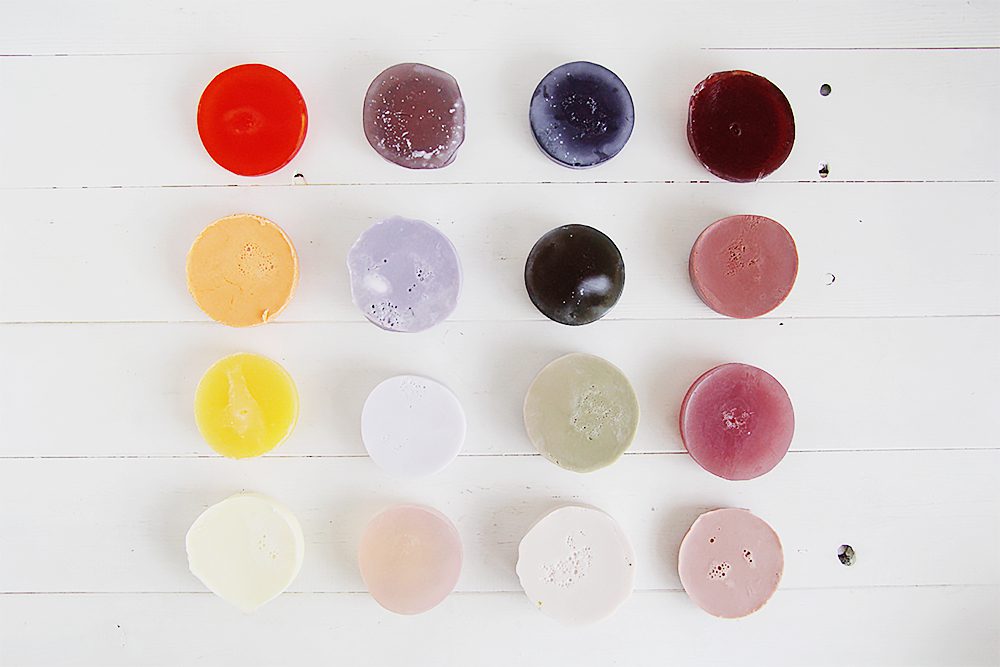
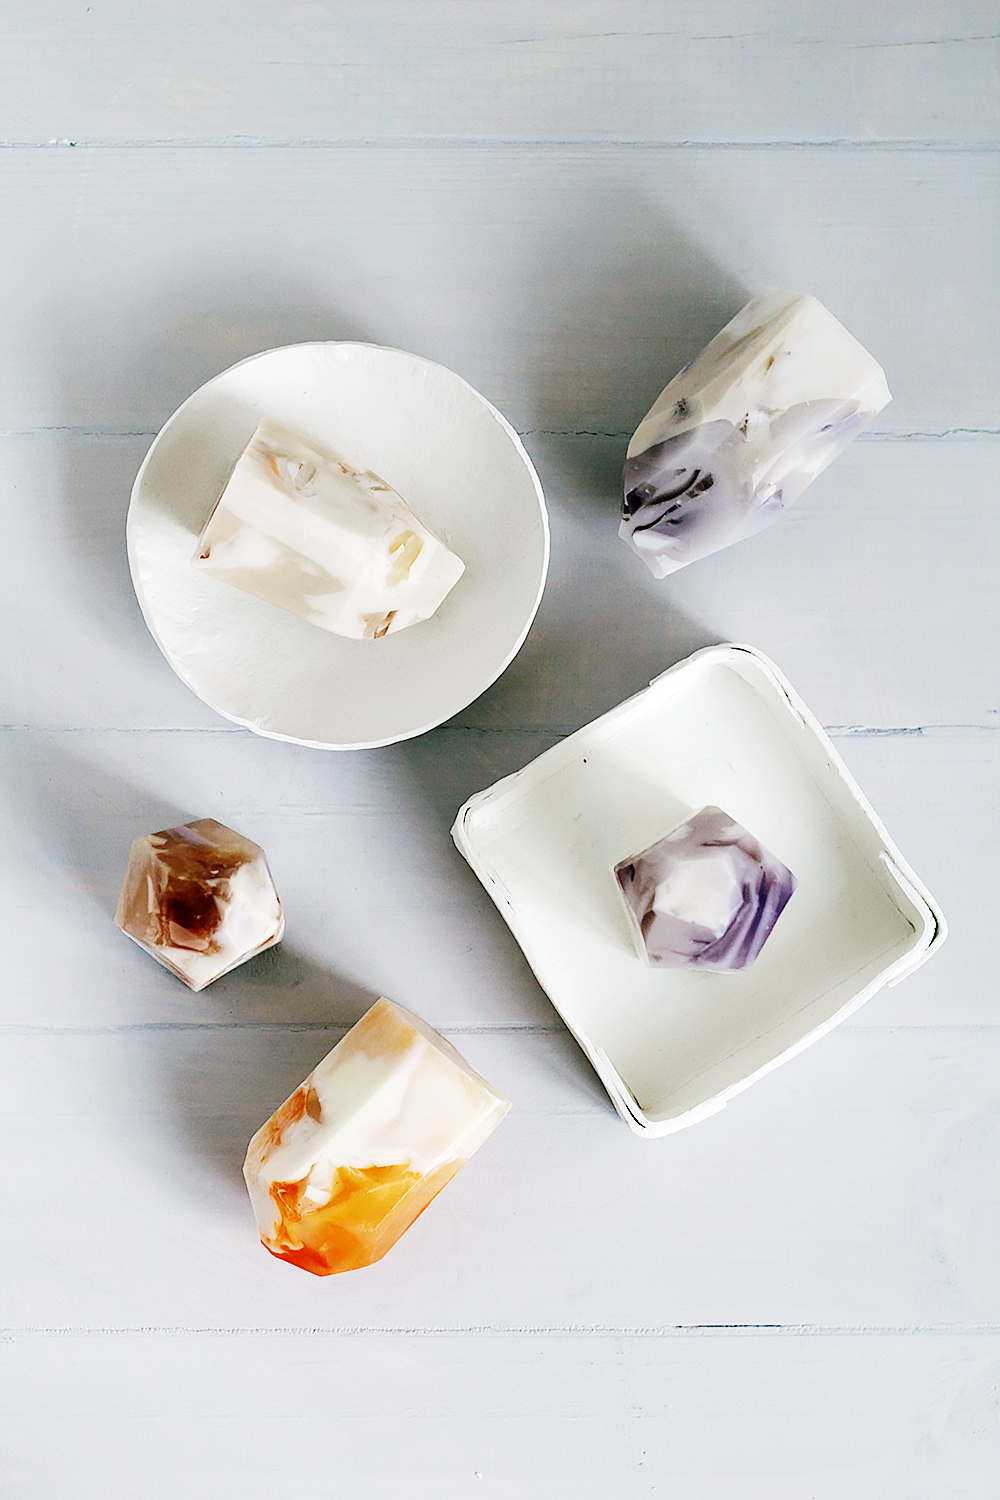
Now make all the colours! Use a mixture of clear and opaque soap bases to make translucent and solid colours.
6. Whilst you’re waiting for the soaps to set (this was the hardest bit!) you can make the second mould. I would definitely recommend using the silicone to make this mould rather than just using a container. We want to make long soaps and the flexibility of the silicone makes it much easier to remove the soap in one piece!
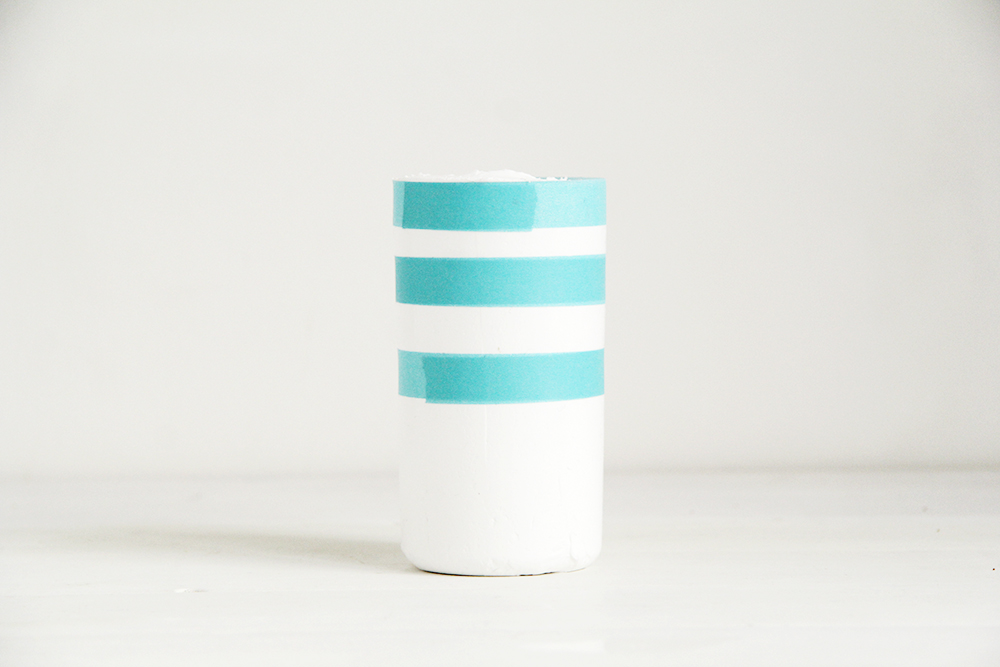
Fill a taller container about half full with your second batch of silicone. Press into this a longer, thinner jar than before. I’m using glass jars (with the labels taken off) because their smooth surface makes removing them from the mould much, much easier! This size of this jar will be about the size of the finished stones so take a little time to source the right size.
7. Once the silicone is set remove it from the container. This is a little tricky. You need to squeeze something thin and sturdy down the sides and all the way around the mould to release it. Once it has come unstuck you can take it out. Do the same for around the edges of the bottle taking care not to damage the insides of the mould.
8. Cut a slit two thirds down the mould.
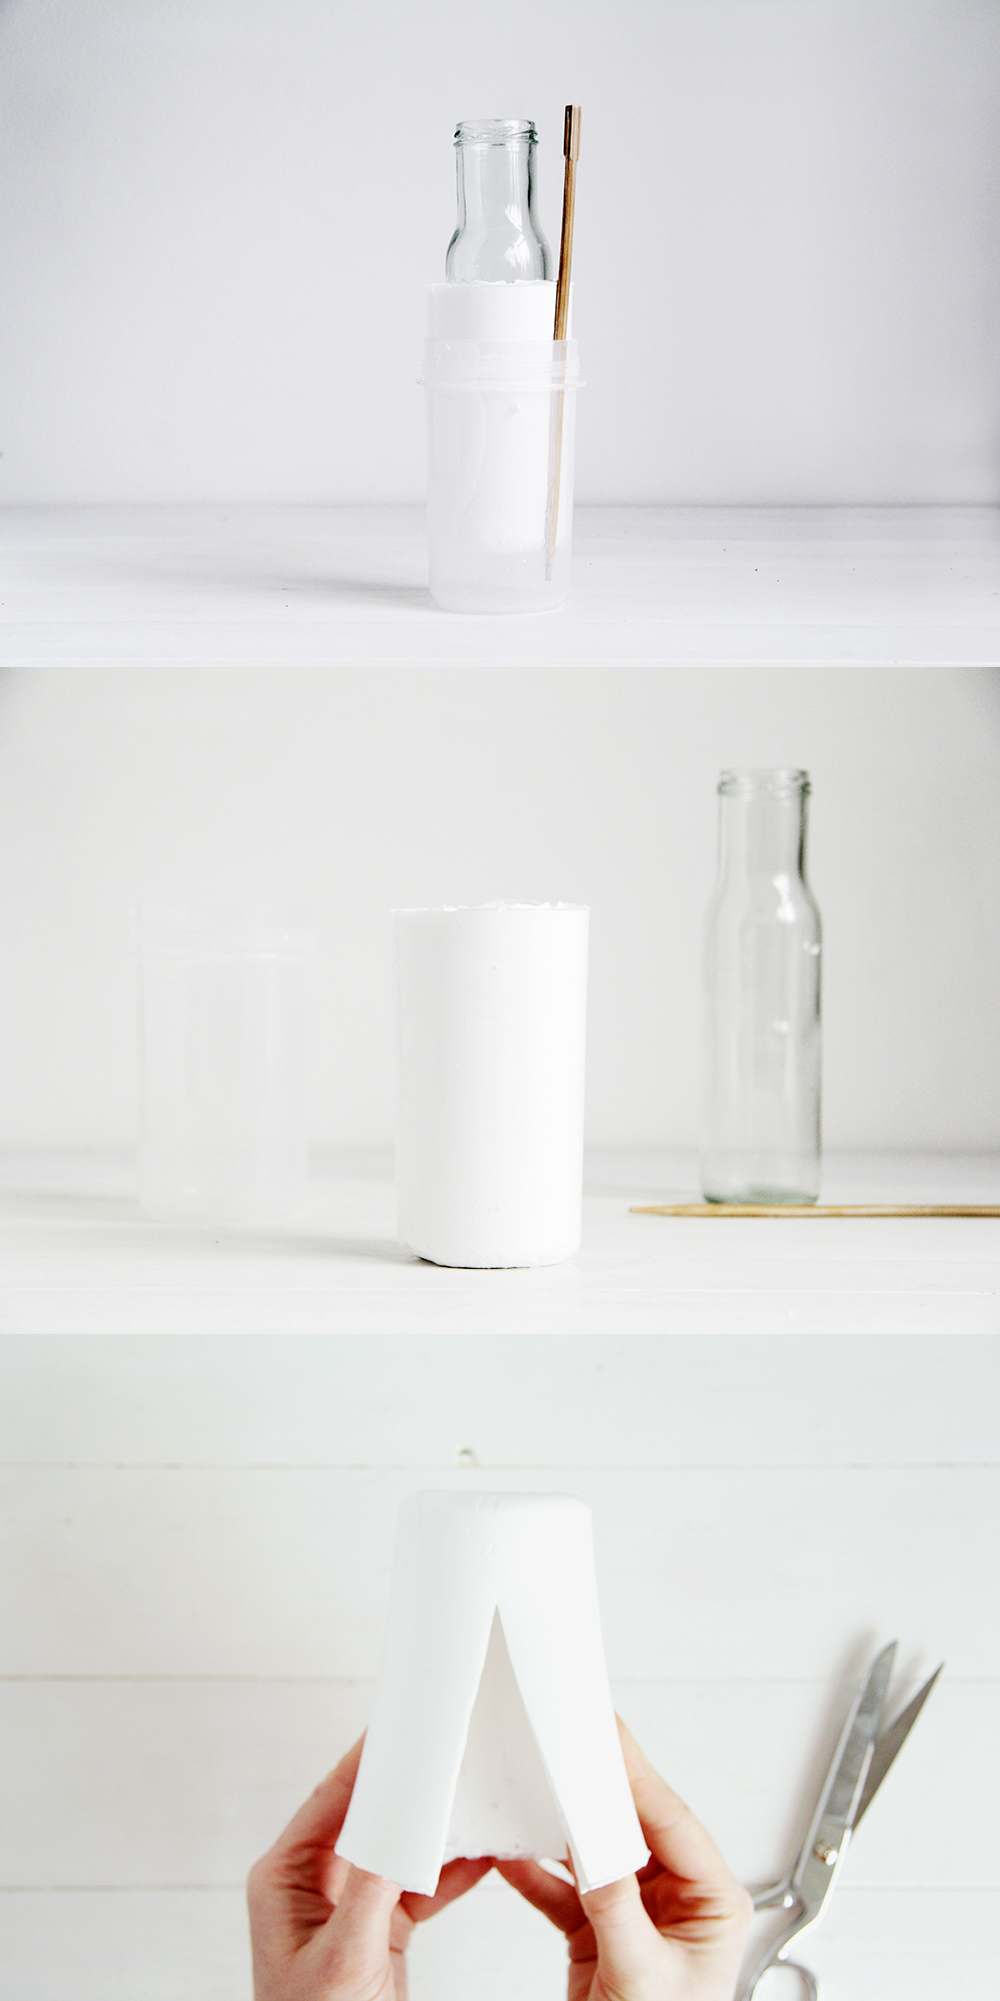
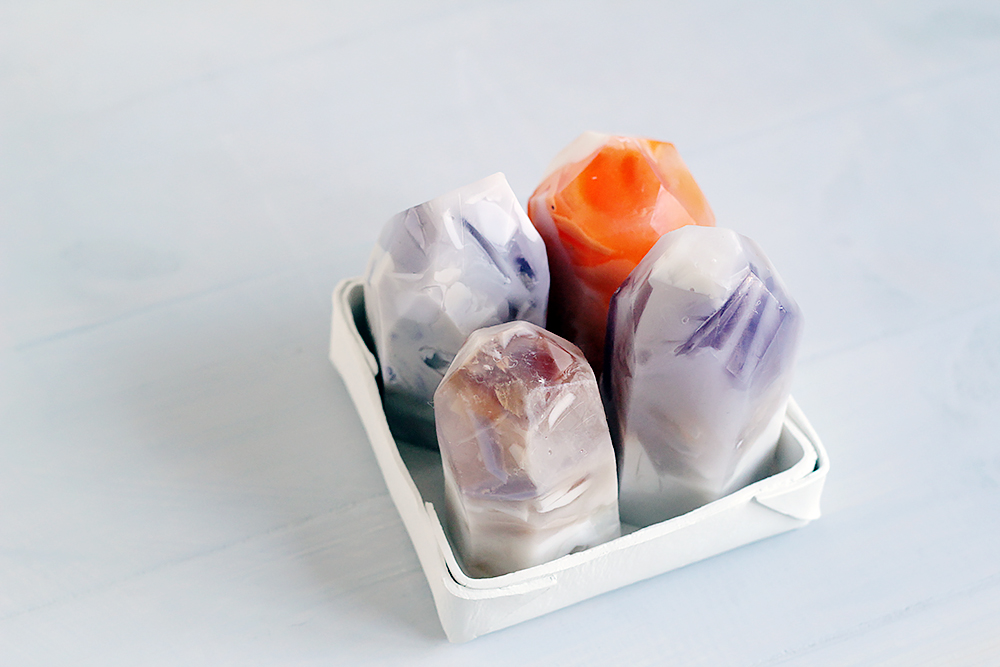
9. Tape the mould back together. I like to pop it back into it’s original container as well just to minimise any leakages. I put a solid object at the bottom of the container for the mould to sit on. This makes it easier to remove later.

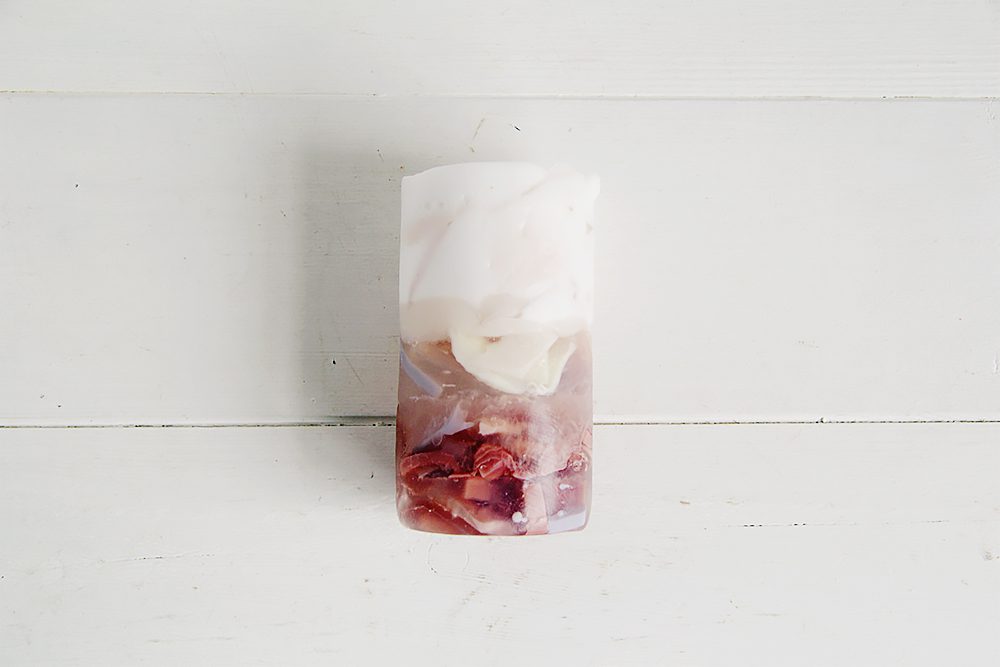
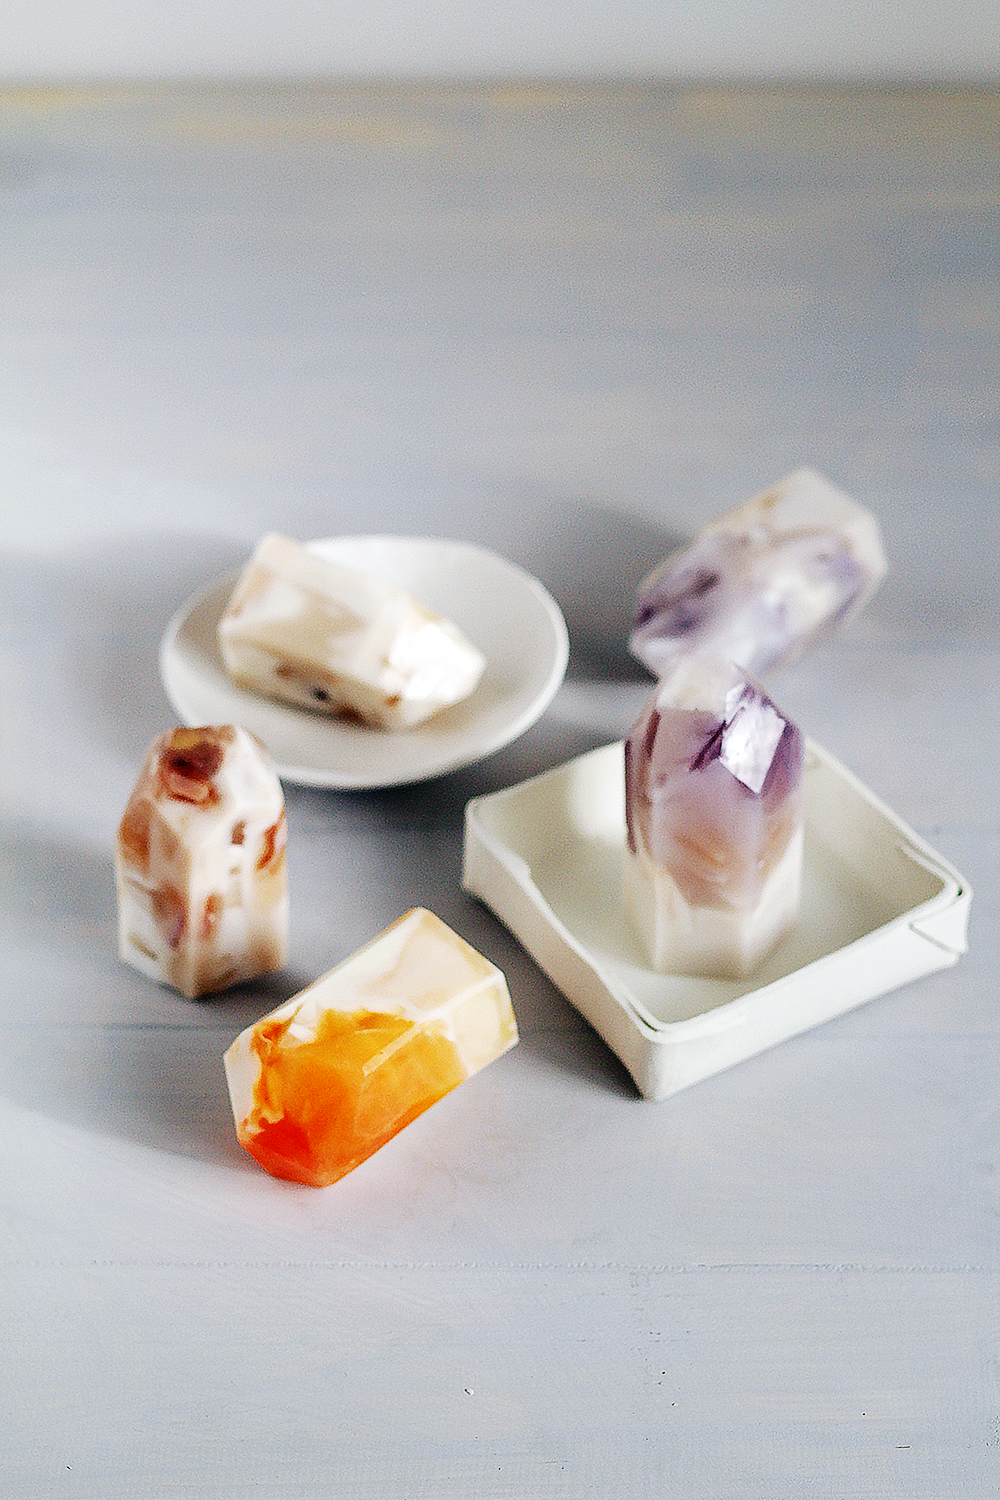
10. Now we get to start putting together our stones. Pick your colours. You can go completely random or take inspiration from real life, it’s up to you. Use the blade to shave off thin pieces of soap.
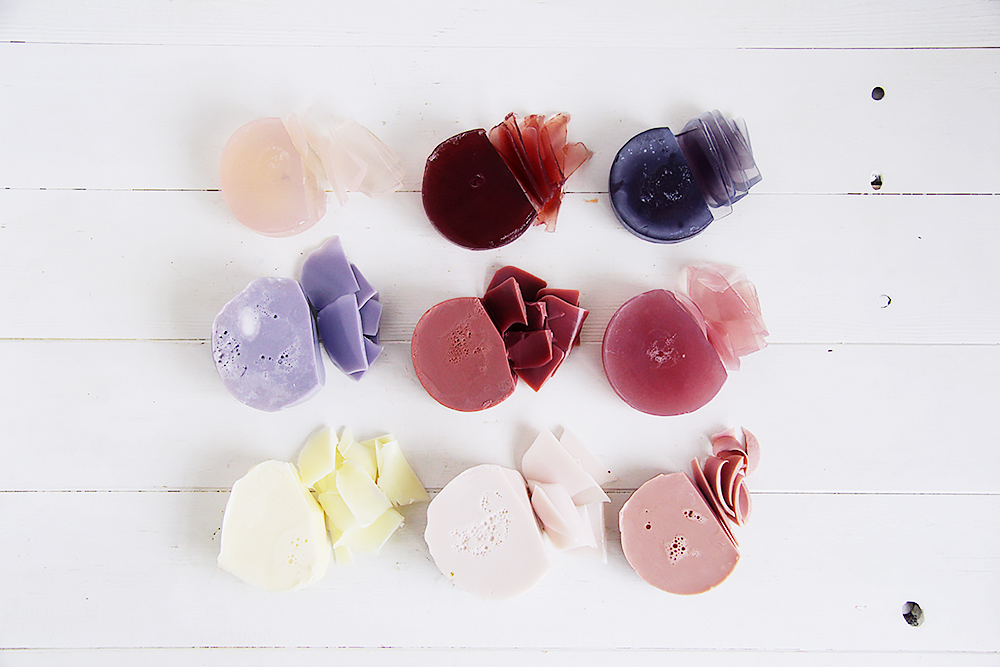
10. Take a random selection of the shavings and fill the mould with them. Try to keep them loose and mixed in a random way. Don’t push down into the mould. Let them fall in a natural way.

11. Separately heat and mix up more soap to pour into the mould over your flakes of soap. To create the semi precious stone look use clearer colours at the bottom of the mould and opaque colours at the top.

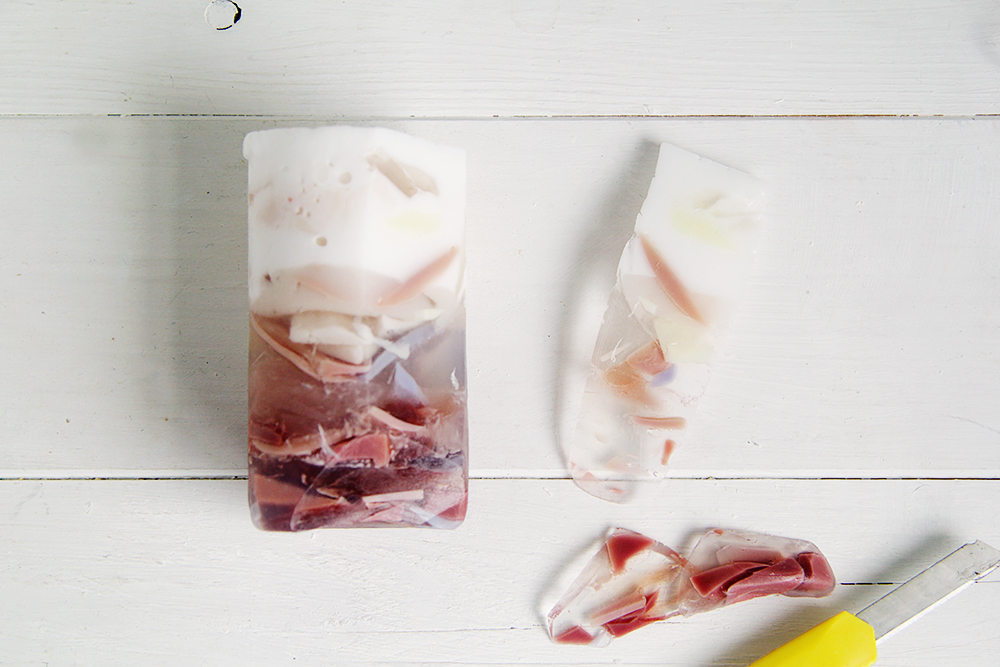
12. Leave the soap to harden and when it’s completely cool (again, muster all you patience here) remove from the mould and wash.
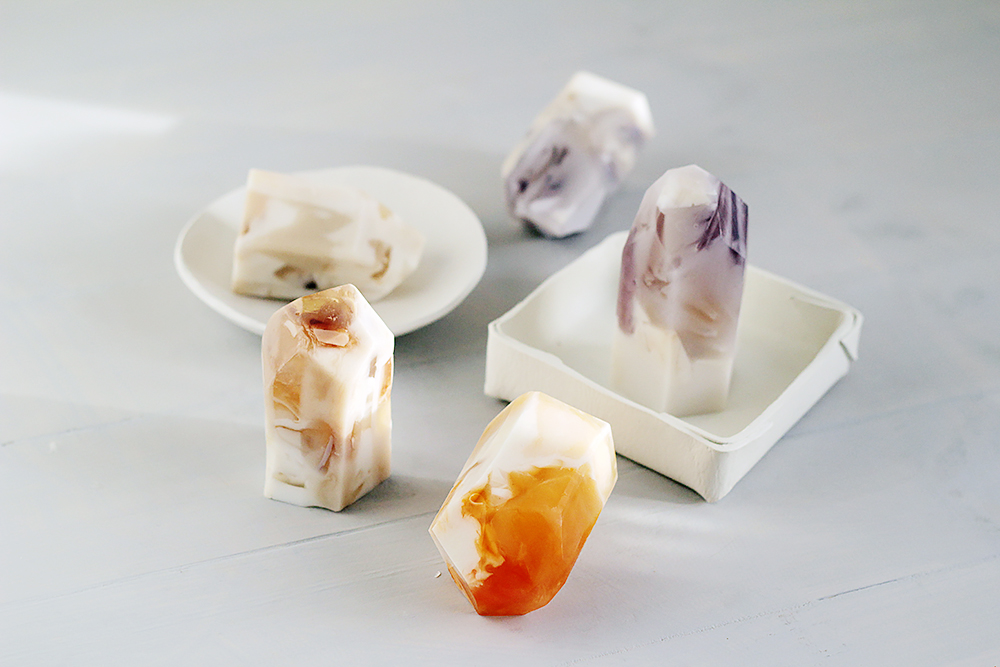
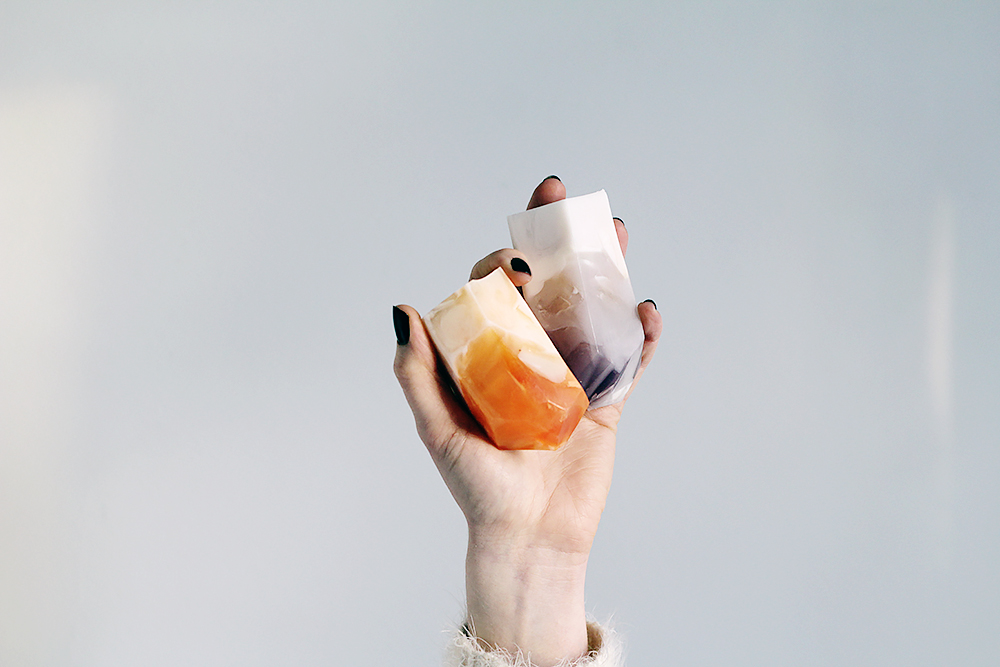
13. Using the knife carefully cut slices from around the edge of the soap and towards the bottom begin to cut into a rough point. You can use your off cuts in your next mould to make them even more detailed! Nothing goes to waste here.

You’ll get different effects from different combinations of soap and pouring techniques. I particularly like to let the first pour set slightly whilst tilting the mould then pour the opaque soap over quickly returning the mould upright. This creates more of a mixture of colours running through the layers, like these:
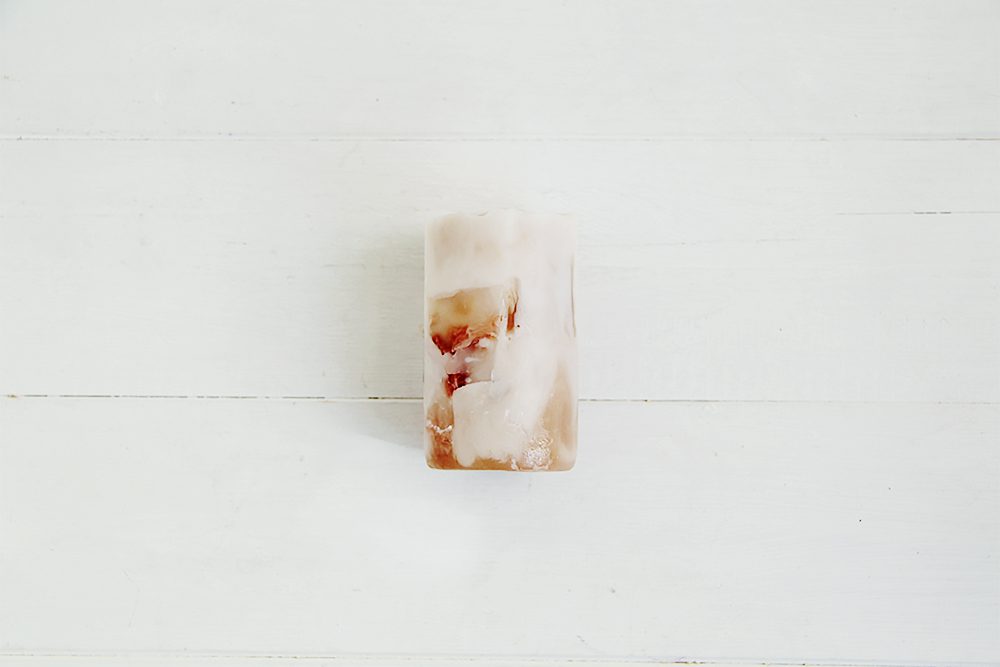
The best thing about this tutorial? There is no end to the variations and techniques you can experiment with to make really uniques soaps. I’ve actually cut up and re-set a few of the soaps you see below when I wasn’t happy with the first result. I actually think that the double process gives them a much more natural, cut from the rock, aesthetic which I love!

I would love to know if you guys are making these soaps! Give me a tag on Instagram @fallfordiy to show me yours!
Related
Original article and pictures take fallfordiy.com site
Комментариев нет:
Отправить комментарий